Saturday, December 10, 2011

12 Days of Christmas - Day 10 Nativity Silhouettes and Card Patterns

Happy Day 10 sweet friends!!!  Today is Card Patterns Saturday and I have a fun little card based on the Card Patterns Sketch to share with you as well as a new technique!!!
Here's the sketch:


and the sponsor:

Monica was so generous to us and I was absolutely thrilled to try the art of metal sheet embossing!!  I have to say it is a wonderful technique and the results are amazing!!!  I I used Stampin Up's Vintage Wallpaper Embossing Folder and ran the metal through my Big Shot just like a regular piece of paper and the result is a crisp and shiny embossed image!! Why haven't I tried this sooner!! Thanks Monica!!!!  I just love metal sheet embossing!

I cut out a 3 1/4" x 4 3/4" piece of Vintage Hymnal paper and punched a 1 3/4" hole in it and also punched the edge with Martha Stewart's Doily Lace Punch.
I stamped the Nativity Silhouettes with Tim Holtz Pumice Stone Ink and placed them over the punched hole so that the embossed metal would show through.  There is such a striking difference between the paper and the metal!!

Supplies Used:
Add a Little Dazzle Colored Metal Sheet
Stampin Up! Vintage Wallpaper embossing folder
Papertrey Ink Nativity Silhouettes Die and Stamps; Photo Finisher Die and Stamps
Hand Dyed Seam Binding and Glitter Star: MemrieMare
Papertrey Ink Rustic Cream Cardstock
Vintage Hymnal Paper
Tim Holtz Pumice Stone Distress Ink

Thanks for stopping by!!!
I hope you have a wonderful weekend!

Friday, December 9, 2011

12 Days of Christmas - Day 9 Santa Paintbrush Ornament

Hi there dear friends!!! Happy 9th day of Christmas!!  I'm feeling a little under the weather today, there's only 16 days left in the season and there's lots of work to be done!!  Today, I have a fun little ornament that's quick and easy to make.  In fact, I used to  make these with my kids when they were younger.  They also make fabulous Christmas presents for friends and family alike!!!
You can use any size paint brush and I like to think that different sizes give the Jolly Old Elf a little extra bit of personality!!!
In addition to these ingredients, I also used a flesh colored pom pom and some glittery snow.

The first step is to paint the brush handle red and the brush white.  Then, paint a little flesh color along the band for the face and add the facial features.  Then comes the fun part....add all the snowy goodness.  There is no right nor wrong way, just have fun with it!!!
The last step is to add a little hanger and your all set to go!!!

Thanks for joining me in my 12 Days of Christmas adventure!!
I'll be back for more fun tomorrow!!!
Have a wonderful day,
Kristii

Thursday, December 8, 2011

Twelve Days of Christmas - Day 8 Front and Center

Happy 8th day of Christmas sweet friends!!!  Today I have a fun little project featuring Papertrey Ink's Front and Center Die!
I started off my Front and Center adventure by running a large glassine bag through my Big Shot with the die.
I almost decorated the glassine bag itself, but I really wanted to make a little Christmas scene with Papertrey Ink's In the Meadow Die Cuts.  So, I covered the glassine bag with Glitz Design Polka Paper and vintage hymnal paper.  Then I added the die cuts, ribbon, and jingle bells to embellish.  I absolutely love the trees that are die cut out of embossed paper.  So pretty!
I added the sentiment to the bag using Papertrey Ink's Photo Finishers Die and Stamps.  

Supplies Used:
Glitz Design Beautiful Dreamer Polka Paper
Papertrey Ink Rustic Cream and True Black Cardstock
Papertrey Ink In the Meadow Dies
Papertrey Ink Photo Finisher Dies and Stamps
Embossed paper and Jingle Bells from my stash
Papertrey Ink Glassine Bags and Button Twine
Prima Lace

Thanks for stopping by!!!
Wishing you a very Merry Christmas!
Kristii

Wednesday, December 7, 2011

12 Days of Christmas - Day 7 Tea Dyed Stocking featuring Lisa Pace's Dr. Warner's Corsets

Happy 7th Day of Christmas my friends!!! I have a fun little tea-dyed stocking project for you today!!
1.  Tea Dye any stocking or sock.  I purchased my stocking already tea-dyed from Real Deals.
2.  Stamp Vintage image and color.  I used Lisa Pace's Dr. Warner's Corsets from her Antiquated Collection by Pink Persimmon.  
I just have to say that the Dr. Warner's Corsets is my favorite stamp so far from her collection, but that is until I work with the other sets! They are all absolutely fabulous!


These are the Copic Markers I used for this project:
3.  After coloring, I cut the image to size and then I painted it with Tim Holtz Rock Candy Distress Crackle Paint.  When the paint was dry, I heavily inked the entire image with Tim Holtz Tea Dye Distress Ink.  You can see the depth the crackle paint and ink added to the image.
4.  I framed the image with Tim Holtz Idea-Ology Ornate Plates and adhered the image to the stocking.
5.  I added some ribbon, Prima Lace, Maya Road Tea Garden Ribbon, some greenery and a Tim Holtz Ideology Key.
Here's what it looks like hanging on my wall:
Thanks for stopping by for today's installment of the 12 days of Christmas!!!
I hope you have a marvelous day,
Kristii

Tuesday, December 6, 2011

12 Days of Christmas - Day 6 Beautiful Dreamer Style

Hi there dear friends!! It's the 6th Day of Christmas and I have a couple of Christmas projects featuring Beautiful Dreamer papers and goodies by Glitz Design to share with you today!!

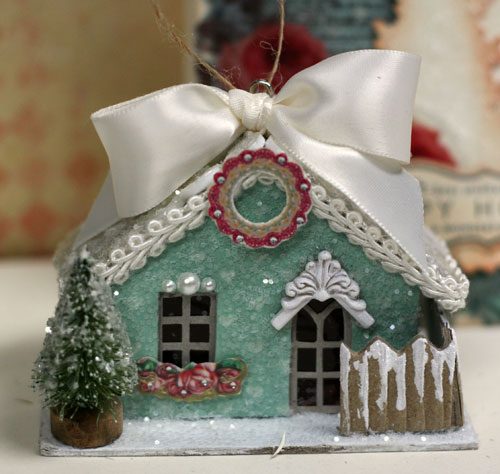
My first project is a fun little altered chipboard house ornament:
I used a Melissa Frances chipboard ornament house as the base.  I traced the house onto the patterned paper and cut it out.  Then I assembled the house as directed.  I covered the house with the patterned paper using Claudine Hellmuth's Gloss Multi-medium.
Then I painted the house base with white paint and then covered the roof with buttons and lace.  I covered the entire house with glitter and then embellished the house with Glitz Design Glitzers, Prima Resin Architecture, Pearls and a little Melissa Frances bottle brush tree. 
 Supplies used:
Glitz Design "Beautiful Dreamer" Paper: Polka
Glitz Design Beautiful Dreamer Glitzers
Papertrey Ink Buttons and twine
Martha Stewart Glitter
White paint, bow and lace from my stash
Recollections pearls

I made a card using the same goodies:
I covered the base of the card with Glitz Design Beautiful Dreamer Polka Paper and layered two Peek a Boos on top.  I die cut two trees, inked them, then covered them in glitter.  I cut the bird from the Dance in Sunshine Paper Layers.  Then, I embellished the card with hand-dyed seam binding, jingle bells, and an angel wing,
Supplies used:
Glitz Design "Beautiful Dreamer" Paper: Polka
Glitz Design "Beautiful Dreamer" Peek a Boos
Glitz Design "Dance in Sunshine" Paper Layers
Papertrey Ink Rustic Cream Cardstock
Papertrey Ink Holiday Photo Finishers Stamps and Dies and Love Lives Here Holiday Dies
Tim Holtz Tea Dye Distress Ink
Hand Dyed Seam Binding: MemrieMare
Jingle Bells from my stash
Martha Stewart Glitter

Monday, December 5, 2011

The Twelve Days of Christmas - Day 5 and Prickley Pear Mondays


Day 5 - Prickley Pear Monday

Hi there dear friends!! It's hard to believe we are already on day five of the Twelve Days of Christmas celebration!! Today is also Prickley Pear Monday and I chose to use Prickley Pear Rubber Stamp's Snowman Postage as the inspiration for today's post:
I started with an old piece of Basic Grey Eskimo Kissed paper from my stash and I die cut the edge of the paper with Papertrey Ink's Edger Collection #3.  I decided the base of my card should be dry embossed with Sizzix snowflake embossing folder to add texture and to enhance the snowy theme.
I punched a 1 3/4" hold into the patterned paper and then decided to make a glittered frame out of Rustic Cream Cardstock.  I die cut a scalloped circle using a Spellbinders Die and then punched the middle out of the circle using the same 1 3/4" punch and then added some glitter to represent snow.
I stamped the Snowman Postage in Momento's Tuxedo Black Ink and then fussy cut the snowman image out.  I lightly colored him with Copic Markers and added glitter to make him shine.  I used Melissa Frances  Deck the Halls 6x6 pad to create the background behind the snowman.  I just love the Christmas music background!
I added the sentiment from Prickley Pear Stamps Vintage Ornament and added glittered snowflakes, ribbon and jingle bells to embellish.
You can see all the layers from this viewpoint.  Such a fun little card to make!!

Supplies used:
Prickley Pear Rubber Stamps Snowman Postage
Prickley Pear Rubber Stamps Vicorian Ornament  (sentiment)
Basic Grey Eskimo Kisses Paper
Melissa Frances Deck the Halls 6x6 pad
Papertrey Ink Rustic Cream Cardstock
Papertrey Ink Edger Collection Dies #3
Spellbinders Scalloped Circle Die
Papertrey Ink Winter Penguin Die
Papertrey Ink Double Edged Banner Die
Martha Stewart Glitter
Ribbon and Jingle Bells from my stash
My Craft Spot Blue Baker's Twine

Thanks for stopping by!!!
Kristii

Sunday, December 4, 2011

The Twelve Days of Christmas - Day 4

Day 4 - It's a Banner Day!!

Today's project is a bold and bright Merry Christmas banner made with Papertrey Ink's Boxy Banner Dies and The Girls' Paperie Tinsel and Twig Papers. 

I loved the Tinsel and Twig papers so much, that I bought extra last year to make this Banner and I hung it over my window in the dining room. 
  Here's a closer view of the Merry Pennants:
and the Christmas side:

and one of the little poinsettias between pennants:


Supplies used:
The Girls' Paperie Tinsel and Twig Papers
Papertrey Ink Boxy Banner Die
Papertrey Ink Signature Series Flower Die
Tim Holtz Paper Rosette Die
Recollections Pearls
Papertrey Ink Felt:  Pure Poppy and Simply Chartreuse
Stampin Up! Tinsel
Lace from my stash
Tim Holtz Tea Dye Distress Ink
Tim Holtz Alphas
Fine Detail Red Embossing Powder

Thanks for stopping by for Day and I'll see you tomorrow for day 5!
Kristii

Saturday, December 3, 2011

Day 3 Hybrid Happiness, Card Patterns #144, and a Chance to Win

Happy Saturday dear friends!! 

It's day 3 of the 12 Days of Christmas Series and also a Card Patterns Saturday and I thought it would be fun to try something new and combine them today!!  Here is the sketch:
and here's my take on the sketch:

Day 3 Hybrid Happiness
I used Rhonna Farrer's Christmas Junque Pieces and Printable Background to create this card.  I just love the Quatrefoil and Ledger background papers!! I know I will use these digital papers over and over again!! I resized and fussy cut all the elements, and then I added some seam binding and baker's twine from this week's sponsor My Craft Spot.  I just love Kim's seam binding!!!  I actually just placed an order for Vintage Valentine Seam Binding yesterday and it has already been shipped!! That's fabulous service I tell ya!!!  I also added some punched pine boughs and a red button to round out the embellishments.  
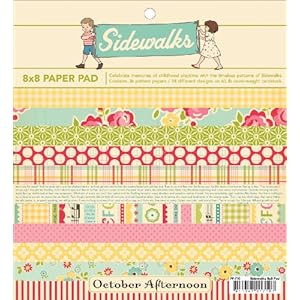
I would love to challenge you to try a hybrid card today.  There are many sites out there that offer free digital goodies and I have a special surprise for you today!!  If you are inspired by this post to try a hybrid card, I will enter you into a drawing for a brand new October Afternoon Sidewalks 8x8 paper pad.

Just post a link to your blog in the comments section by midnight, December 12th, and I will add your name to the drawing.  Please use at least one digital image in your card to qualify for the drawing.

Thanks for joining in the fun and I look forward to seeing what you create!!!!
Have a wonderful day and Happy Creating,

Kristii

Friday, December 2, 2011

Day 2

Hi there dear friends!! Happy 2nd Day of December!!!  I'm absolutely thrilled to share today's installment of:
                                             

Holiday Candy Tube
This cute little candy filled tube will be perfect for a stocking stuffer this year!!!
 I've been dying to use my cute little Papertrey InkWinter Penguin Stamps and I thought this little project would be perfect!!! I die cut and stamped the adorable little penguin and colored him with a YR82 (mellow peach) Copic Marker. Next, I die cut a PTI Damask Snowflake and doily.  I punched out a 1 3/4 in circle out of the doily and then I inked and glittered them both.  I die cut two PTI Tag Sale Tags and snowflakes and assembled all the layers.  I embellished the tag with a large bow, pearls and punched pine boughs.
Here is a photo of the backside of the SRM Stickers tube filled with red m&m's .  Such a fun little treat!

Supplies used:
Glitz Design Beautiful Dreamer Polka and Stripe Paper
Papertrey Ink Rustic Cream Cardstock
Papertrey Ink Dies:  Damask Snowflake, DoilyWinter Penguin  PTI Tag Sale #3 and #5
Papertrey Ink Stamps:  Winter Penguin 
Copic Marker
Martha Stewart Glitter
Recollections Pearls
McGill Pine Bough Punch
Joann's Fabrics Ribbon

Thanks for stopping by and joining in the 12 Days of Christmas fun!!!
Unitl tomorrow,
Kristii


Thursday, December 1, 2011

The Twelve Days of Christmas 2011

Happy December first everyone!!!  I'm so excited to get started with the 12 Days of Christmas posts!! 
Sigh....I just love this time of the year and I hope you will join me for the next twelve days of fun Christmas projects and gift ideas!!   I made a fun little banner for the occasion using Rhonna Farrer's Christmas Junque Digital Images

Day 1- Card and Ornament Set

My first project features Glitz Design Beautiful Dreamer papers and a new vintage stamp by Lisa M. Pace.  If you haven't seen Lisa's new stamps made by Pink Persimmon, you will definitely have to check them out!! They are full of vintage goodness and I love each and every one of them!!  I also used a vintage hymnal page featuring "Away in a Manger", one of my favorite Christmas Carols.   I embellished the card with some hand dyed seam binding, lace, a stamped tag and a gorgeous Maya Road Vintage Findings Pearl Center.  I added some punched snowflakes with pearl centers to the hymnal paper to add some texture and color.

I selectively punched out the angel from the Dr. Warner's Corset stamp using a 1 3/4" circle punch:
and I used Copic Markers to lightly color in the image.  Then I inked the edge of the circle with Tim Holtz Tea Dye Distress Ink.

For the ornament, I die cut two Papertrey Ink Damask Snowflakes.  The snowflakes were inked and then covered in glitter and layered one on top of the other.  I added the punched circle in the middle of them and added Rusty Jingle Bells, a golden snowflake and tea dyed twill ribbon to embellish.
Supplies used:
Papertrey Ink Rustic Cream Cardstock and Button Twine
Vintage Hymnal Paper
Martha Stewart Glitter
Metal embellishments from Red Lead
Recollections Pearls
Prima Lace
EK Success Snowflake Punch
Tim Holtz Tea Dye Distress Ink by Ranger
Rusty Bells from Frost It Pink
Hand Dyed Seam Binding by MemrieMare

Thank you for joining me on the first day of our twelve day adventure!!!
Wishing you a blessed Holiday Season,
Kristii